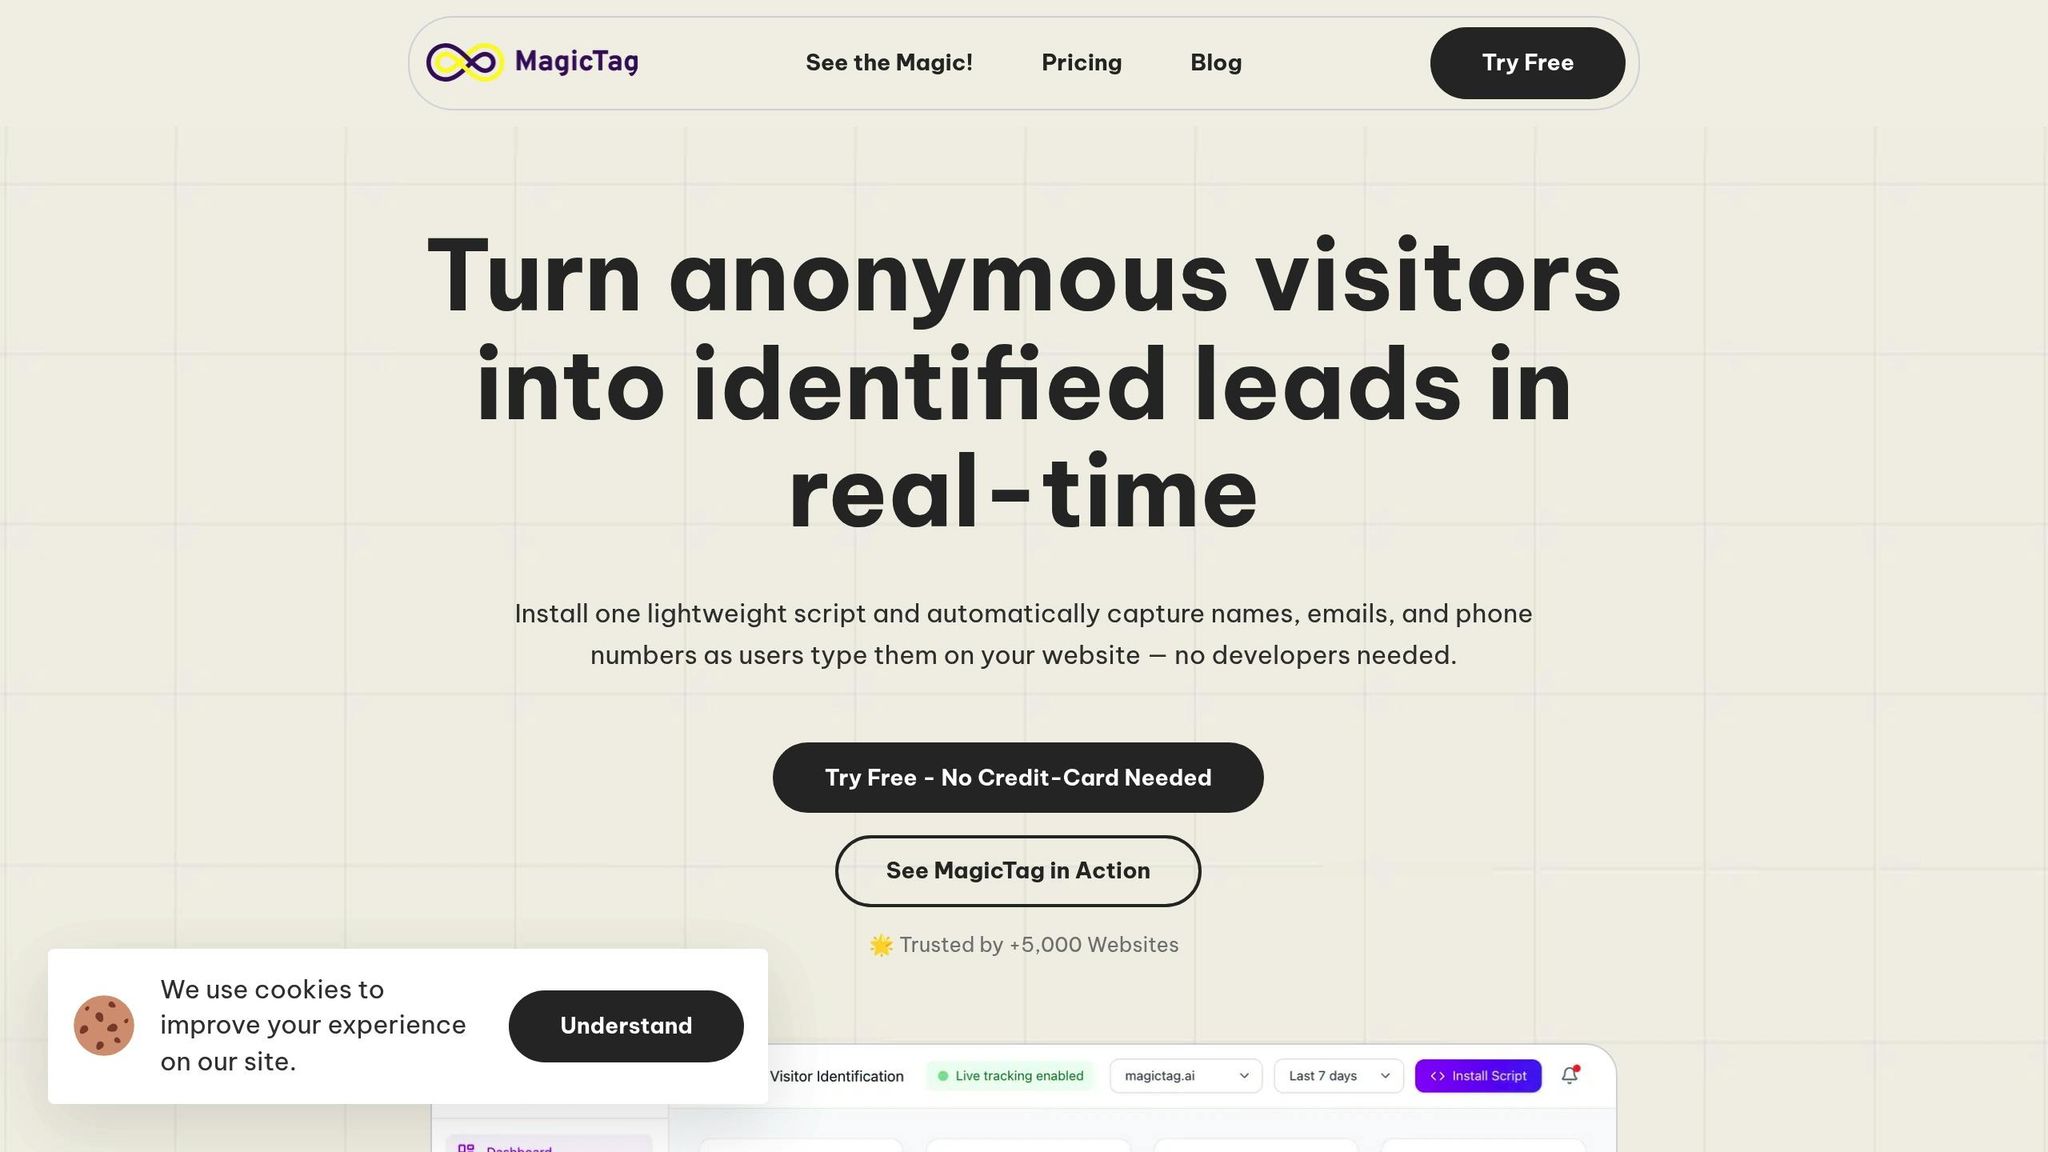
MagicTag helps U.S. businesses recover lost leads from abandoned web forms by seamlessly syncing incomplete form data into Salesforce. This Chrome extension captures details like email, phone, and company name in real-time - even if users don’t hit submit. Teams can set it up in about a week without coding, ensuring Salesforce fields are ready to handle U.S.-formatted data.
Key benefits include:
- Recovering leads from incomplete forms, turning missed opportunities into actionable insights.
- Automating data entry, saving time and reducing errors.
- Improved follow-ups through accurate, real-time data integration.
With features like webhook setup, field mapping, and lead scoring, MagicTag ensures your sales team has the information they need to act fast, boosting conversions and maximizing ROI.
Customize & Automate Your Lead Lifecycle in Salesforce
Preparing Salesforce and MagicTag for Integration
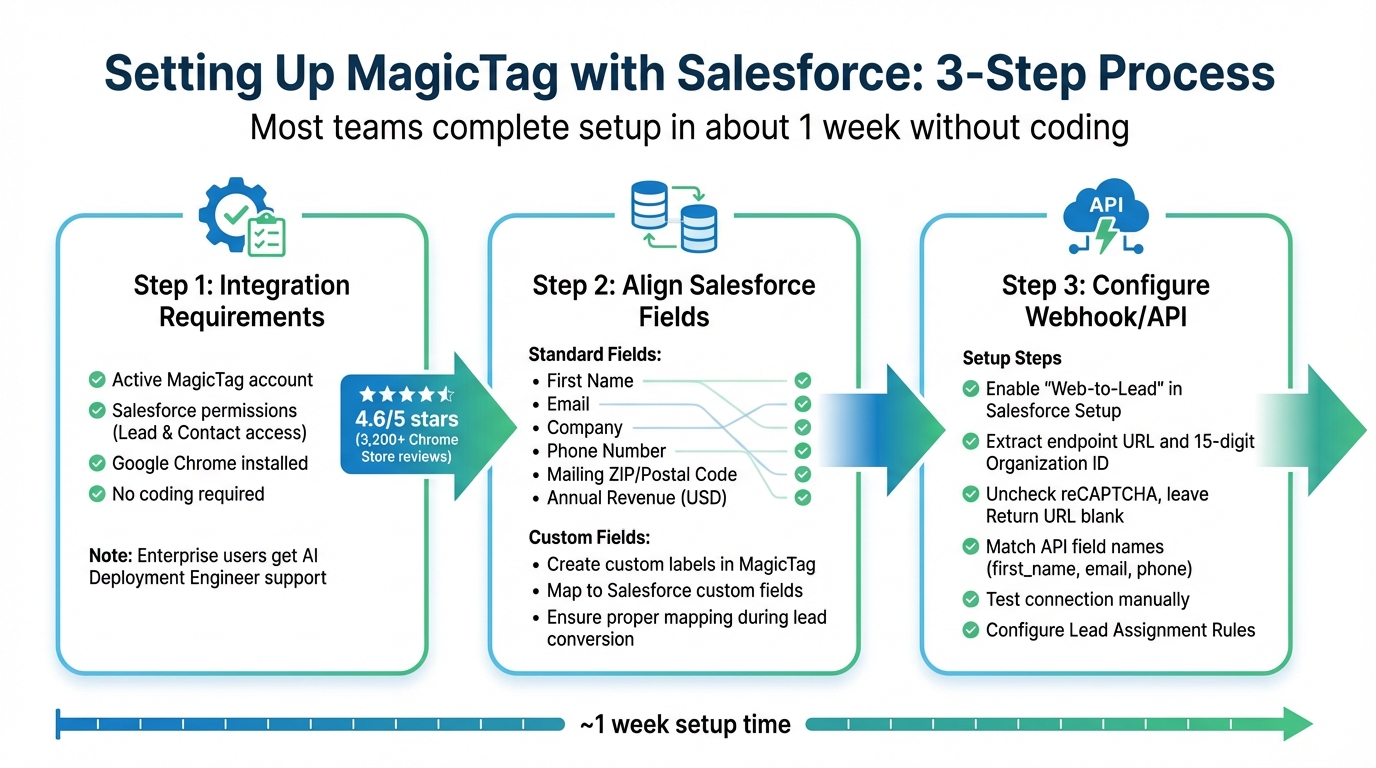
MagicTag Salesforce Integration Setup Process - 3 Key Steps
To get Salesforce and MagicTag working together, you’ll need to set up both platforms so they can communicate effectively. MagicTag is built to integrate without the need for complex coding or engineering help - most teams are up and running in about a week. The process involves three key steps: confirming access and tools, preparing Salesforce fields to handle U.S.-formatted data, and setting up the connection between the two platforms. Once completed, this setup ensures a smooth flow of data into Salesforce.
Integration Requirements
Before starting, make sure you have an active MagicTag account and the necessary Salesforce permissions to view and edit Lead and Contact records. Since MagicTag primarily runs through a Chrome extension, you’ll also need Google Chrome installed.
The integration process doesn’t require any coding, so you won’t need IT or engineering resources to get started. For enterprise users, MagicTag provides support from an AI Deployment Engineer to help with initial setup and workflows. This dedicated assistance has contributed to MagicTag’s 4.6/5 star rating on the Chrome Store, based on over 3,200 reviews.
Aligning Salesforce Fields for MagicTag Data
To ensure Salesforce can handle the data MagicTag collects from your website forms, you’ll need to verify that your Lead and Contact fields are properly configured. Typically, these fields include First Name, Email, Company, Phone Number, Mailing ZIP/Postal Code, and Annual Revenue (formatted in USD).
If you’re working with U.S.-specific data like State and ZIP Code, these fields should be set up as standard Salesforce fields to maintain accurate data entry. For non-standard data points - such as custom budget ranges or product preferences - you can create custom labels in MagicTag and map them to custom fields in Salesforce. Be sure to map these custom fields correctly during lead conversion to avoid errors.
Setting Up the MagicTag Webhook/API Endpoint
To establish the connection between MagicTag and Salesforce, you’ll need to configure a webhook endpoint. Start by enabling the "Web-to-Lead" feature in Salesforce Setup. Create a Web-to-Lead form to generate the required HTML code. From this code, extract the endpoint URL and your 15-digit Organization ID.
Make sure to uncheck the reCAPTCHA option and leave the Return URL blank to avoid processing issues. Identify the API field names (like "first_name", "email", and "phone") in the HTML, and ensure they match the data labels you’ve set up in MagicTag. Test the connection by manually submitting data to confirm it’s being captured in Salesforce without delays. Lastly, configure Lead Assignment Rules to automatically route recovered leads to the appropriate sales or marketing teams.
Installing MagicTag on Your Website Forms
Once Salesforce is set up, the next step is to install MagicTag on your website forms. This involves adding the MagicTag Chrome extension, labeling the necessary form fields, and testing the setup using U.S.-formatted data to ensure everything works smoothly.
Adding MagicTag to Website Forms
MagicTag is designed to capture data as users type into your forms - even if they don’t hit submit. To begin, install the MagicTag Chrome extension in your browser. After installation, navigate to the website form you want to integrate with MagicTag.
Open the MagicTag side panel and start labeling the key fields such as First Name, Email, Company, Phone, and ZIP Code. If you need additional fields, use the "Add More" option. MagicTag’s AI will automatically detect these fields. Make sure phone numbers include U.S. area codes (e.g., 555-123-4567) and ZIP codes follow the standard 5-digit format (e.g., 90210) to align with Salesforce’s data requirements.
Testing MagicTag Data Capture
Once your fields are labeled, it’s time to test if MagicTag is capturing data correctly. This step ensures everything is functioning as expected before you go live.
Fill out your website form using sample U.S. data, such as a budget in USD. Then, open the MagicTag side panel and check the Transfers tab to confirm the fields are being detected. To validate the setup in Salesforce, create a test Lead or Contact record. In any empty field, type "//" and select the appropriate data from the dropdown menu. If the data appears in the correct fields, your setup is ready. If you encounter any issues with field mapping, you can reset everything by clicking "Delete all labels" in the Transfers tab and remapping the fields from scratch.
sbb-itb-77d5bc3
Integrating MagicTag Data into Salesforce
Once you've confirmed that MagicTag is accurately capturing your form data, the next logical step is to connect that data directly to Salesforce. This integration ensures that every lead - whether they complete the form or abandon it midway - seamlessly flows into your CRM, eliminating the need for manual data entry.
Mapping MagicTag Data to Salesforce Fields
Field mapping is the backbone of a smooth integration process. To begin, head to Setup > Object Manager > Lead > Fields & Relationships in Salesforce, and click on the Map Lead Fields button. This interface allows you to specify exactly where the MagicTag data will populate within Salesforce.
Some of the most commonly mapped fields include Email, First Name, Company, Phone, and Form URL. It's important to ensure that the data types align between MagicTag and Salesforce fields. For instance, stick to standard U.S. formats for phone numbers and ZIP codes to avoid compatibility issues.
If you're trying to link custom MagicTag fields to standard Salesforce fields - like mapping a custom "Lead Score" to a standard Account field - you’ll need to use Salesforce Flow as a workaround. Since direct mapping between custom and standard fields isn't supported, you can create hidden technical text fields on both objects to act as a bridge for the conversion process.
Once your fields are mapped, the next step is automating lead creation and updates.
Building Salesforce Logic for Lead Creation and Updates
With Salesforce Flow, you can automate the process of creating and updating leads based on specific triggers. For instance, when MagicTag sends a new lead via a webhook, Flow can determine if the email already exists in your database. If it does, the system updates the existing record with new activity. If not, it creates a new lead.
Here’s how HTTP methods come into play:
- Use POST to create new lead records.
- Use PATCH or PUT to update existing records, typically using a unique identifier like Email.
Keep an eye on HTTP status codes to identify any issues early. A 201 status indicates a successful operation, while errors like 400 or 401 suggest a bad request or authentication failure. Automating these processes can lead to measurable improvements in lead conversion rates - some implementations have shown up to a 15% boost when workflows are streamlined.
Automating Data Flow Between MagicTag and Salesforce
To ensure a continuous data flow, set up automated data transfers using the Salesforce REST API or middleware tools. The REST API facilitates communication with Salesforce through standard HTTP methods, allowing you to access and manipulate lead data programmatically.
To get started, create a "Connected App" in Salesforce to obtain OAuth 2.0 credentials, including the Consumer Key (Client ID) and Consumer Secret (Client Secret). Navigate to Salesforce Setup > App Manager > New Connected App to enable OAuth settings and define the necessary scopes for lead management. Once authenticated, MagicTag can push data in JSON or XML formats, mapping fields like Email, Company, and Name.
For handling large volumes of leads, consider leveraging Salesforce's Bulk API, which processes data in batches to prevent exceeding API rate limits. The Bulk API can sync around 12,000 records per hour, making it ideal for high-volume lead recovery scenarios. Always use HTTPS to secure sensitive data during transmission.
| HTTP Method | Action in Salesforce | Use Case for MagicTag |
|---|---|---|
| POST | Create | Adding a new Lead or Contact from a form submission |
| PATCH/ PUT | Update | Modifying an existing Lead with new activity or a "recovered" status |
| GET | Retrieve | Checking for duplicate leads in Salesforce before creating a new one |
| DELETE | Remove | Deleting test data or invalid lead entries |
Improving Lead Recovery and CRM Workflows
Integrating MagicTag with Salesforce can reshape how CRM workflows operate, turning previously lost data into revenue opportunities. The key lies in organizing, prioritizing, and acting on the insights MagicTag provides to convert abandoned form fills into meaningful business outcomes.
Segmenting and Prioritizing Recovered Leads
Not all leads hold the same value. MagicTag captures data points like company size, industry, and behavioral patterns, which can be used to segment leads into actionable categories. Through lead scoring, you can evaluate behaviors - such as repeated visits to pricing pages - while lead grading helps determine how well a lead aligns with your Ideal Customer Profile (ICP) using firmographic data.
For example, in 2024, OpenPhone, a business phone platform, used the Default platform to automate lead scoring and routing. By filtering out low-fit leads and incorporating calendar scheduling for high-priority prospects, they reduced their speed-to-lead by 67% and boosted inbound conversion rates by 17%. This level of precision is achievable when MagicTag data is mapped into structured Salesforce fields.
"Lead prioritization is a system, not a score - it connects ICP definition, qualification, buying signals, and automation into one GTM workflow." - Stan Rymkiewicz, Head of Growth, Default
Establishing clear numerical thresholds within Salesforce is essential. For instance, leads from companies with over 50 employees who repeatedly visit the pricing page should prompt immediate follow-up by sales. Research shows that organizations employing strategic segmentation generate 208% more revenue from their marketing efforts compared to those relying solely on basic demographic data.
Once leads are segmented and prioritized, the next step is to set up automated, personalized follow-ups.
Building Automated Follow-Up Workflows in Salesforce
With segmented leads in hand, Salesforce Flow Builder can streamline follow-up actions as soon as a lead is created or updated. Record-triggered flows can automatically assign leads based on criteria like region or product interest.
For leads that aren’t quite ready for direct sales contact, design nurture sequences that gradually provide more valuable content. This could include explainer videos, case studies, or webinar invites tailored to their engagement level. For example, if a lead watches half of a demo video, you could send a follow-up email with a relevant case study. If they click on a specific link, create a task for the account owner to reach out within two hours.
"A follow-up shouldn't come across as a desperate attempt to close the deal. It should convey the fact that you've been listening." - Salesforce Canada
Set up real-time alerts via Slack or email to notify your sales team when high-intent leads return to your website or engage with a follow-up message. Leveraging these automation tools can boost sales team productivity by as much as 30%. Always test workflows in "Debug" mode before rolling them out.
Tracking Results with Reports and Dashboards
Automation simplifies follow-ups, but tracking results is crucial to measure success. Use Salesforce dashboards to monitor the impact of MagicTag integration. Focus on metrics like recovered leads, response times, and revenue generated. Make sure the "Lead Source" field is properly mapped during integration so you can directly attribute conversions to MagicTag.
Organize lead recovery efforts using campaign hierarchies in Salesforce to calculate ROI and compare the effectiveness of different strategies. Segment reports by lead quality, prioritizing those with complete contact data (like email and phone numbers) or high-intent behaviors.
Sales teams using Salesforce automation have collectively saved over 42 years of time. Use these insights to turn real-time visibility into actionable strategies, leveraging AI tools to assess the health of opportunities created from recovered leads. Regularly review conversion rates by segment and adjust scoring weights to focus on attributes that drive revenue.
Conclusion
Integrating MagicTag with Salesforce simplifies lead recovery by capturing user data as it's entered into forms. This eliminates the need for manual data entry, enabling tailored follow-ups and more precise audience segmentation. The result? A smoother process that drives noticeable improvements in sales efficiency.
Automation can increase sales productivity by 25% and boost the number of qualified leads by up to 451%. This is especially crucial when sales representatives spend 70% of their day on tasks unrelated to selling.
"Without lead capture forms, potential customers will be visiting your site and bouncing... This means you'll miss opportunities to connect with interested individuals." - Salesforce
This quote underscores the importance of capturing every potential interaction to build a strong lead recovery strategy. Following the integration workflow in this guide - from setting up webhooks and mapping fields to automating lead scoring and tracking dashboards - ensures no lead slips through the cracks. Real-time synchronization keeps your CRM aligned with current prospect behavior, while automated workflows ensure high-intent leads are routed to the right sales rep without delay.
Start by defining clear integration goals and focusing on maintaining high-quality data. With MagicTag feeding directly into Salesforce, you're not just recovering missed leads - you’re creating a reliable, scalable system to convert website visitors into valuable revenue streams.
FAQs
How does MagicTag collect data from partially completed web forms?
MagicTag takes the hassle out of lead tracking by capturing the information users type into web forms the moment they start filling out fields - no need for them to hit the Submit button. This data is automatically sent to Salesforce, where a lead record is created instantly, ready for follow-up.
By working in real-time at the field level, MagicTag ensures no lead slips through the cracks. It eliminates the need for manual data entry and makes it easy to recover abandoned leads, keeping your CRM workflows smooth and efficient.
How can I integrate MagicTag with Salesforce to streamline lead recovery?
Integrating MagicTag with Salesforce is a straightforward process that helps you automate lead recovery effortlessly. Here's a step-by-step guide to get started:
- Log into MagicTag: Access your MagicTag account and head over to the Integrations section on your dashboard.
- Connect Salesforce: Choose Salesforce as your integration platform and follow the prompts to authorize both accounts.
- Field Mapping: Align your MagicTag form fields (like Name, Email, Company) with the corresponding lead fields in Salesforce.
- Set Triggers: Define when data should transfer, such as after a MagicTag form submission, ensuring leads are sent to Salesforce in real time.
- Test and Activate: Submit a test form, confirm the data appears correctly in Salesforce, and then activate the integration.
Once everything is in place, MagicTag will automatically send your captured leads to Salesforce, streamlining your CRM workflow and boosting lead recovery efficiency.
How do I ensure MagicTag data matches my Salesforce fields correctly?
To make sure MagicTag data integrates properly with your Salesforce fields, start by mapping each MagicTag form field to its matching Salesforce field in the integration settings. Pay close attention to data types - like ensuring U.S. currency fields are formatted as $XX.XX or dates follow the MM/DD/YYYY format. This helps prevent errors during data transfer.
Once your mappings are saved, activate Salesforce validation rules and required-field settings to catch any mismatched or missing data before new records are created. You can take it a step further by setting up workflows in MagicTag to automate lead updates in Salesforce. Additionally, use Salesforce tools like Flow to clean up and standardize incoming data - think state abbreviations, phone numbers, or consistent number formatting.
Finally, run test submissions and check the results in Salesforce. This will help you fine-tune your setup to ensure every lead is accurately matched and fully prepared for your CRM workflows.